Eggs are a staple in kitchens around the world. With their high protein content and versatility, it’s no wonder that they’re a go-to ingredient for breakfast, lunch, dinner, or even snacks. Hard-boiled eggs, in particular, are quick, easy, and nutritious. But if you’ve ever peeled open a hard-boiled egg only to find an unsightly green ring around the yolk, you might be left wondering what went wrong. The good news? That green ring is harmless, and better yet—it’s entirely preventable. Read on to learn what causes that green hue and how to get perfectly cooked eggs every time.

What Causes the Green Ring on Hard-Boiled Eggs?
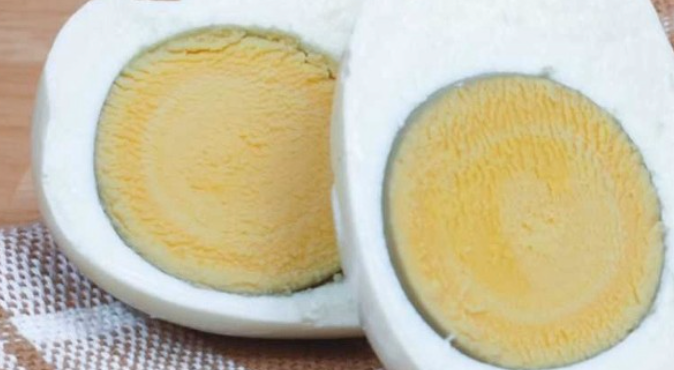
If you’ve ever sliced into a hard-boiled egg and been greeted by a greenish-gray ring around the yolk, it’s easy to feel put off. But rest assured, the discoloration doesn’t mean your egg is spoiled. It’s simply a sign that the egg was overcooked.
So, what’s happening inside the egg? When you overcook an egg, the heat triggers a chemical reaction between the hydrogen sulfide in the egg white and the iron in the yolk. This interaction creates ferrous sulfide, the compound responsible for that greenish color. While the appearance might not be ideal, the egg is still perfectly safe to eat.
Why Overcooking Causes Discoloration
Just like overcooked meat can turn tough or dry, eggs are no different. The longer an egg stays in boiling water, the more its proteins break down and interact with other components, such as the iron and sulfur. This results in that green ring and changes the texture of the egg. The yolk may become chalky, and the egg white turns rubbery, making the eating experience less enjoyable.
How to Avoid the Green Ring on Your Hard-Boiled Eggs
Now that you know the green ring is caused by overcooking, the solution is simple: timing is everything. Perfectly cooked hard-boiled eggs come down to boiling them just right. Here’s how you can ensure your eggs are flawless, every single time.
Step-by-Step Guide to the Perfect Hard-Boiled Egg
1. Start with Cold Water Begin by placing your eggs in a pot and covering them with cold water. Make sure the water is about an inch above the eggs to ensure even cooking. Starting with cold water prevents the eggs from cooking too quickly, which could contribute to uneven doneness or cracking.
2. Bring the Water to a Gentle Boil Place the pot on medium-high heat and let the water come to a gentle boil. Once it reaches a rolling boil, reduce the heat to medium and let the eggs simmer. This ensures that the eggs cook evenly without becoming overcooked.
3. Set a Timer: 10 to 12 Minutes This is the crucial step: timing. The perfect hard-boiled egg typically takes between 10 to 12 minutes to cook, depending on how firm you want the yolk. For a fully cooked but tender yolk, 10 minutes is ideal. If you prefer a firmer yolk, aim for 12 minutes. To ensure you don’t forget, set a timer on your phone or use a kitchen timer.
4. Cool the Eggs Immediately Once your timer goes off, drain the boiling water and transfer the eggs to a bowl of ice water. This will quickly stop the cooking process and prevent the eggs from overcooking, helping you avoid that green ring around the yolk. Let the eggs cool for about 5-10 minutes before peeling.
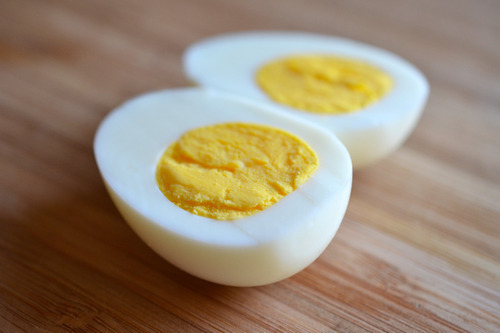
5. Peel and Enjoy Once the eggs have cooled, gently tap them on a hard surface to crack the shell. Roll the egg between your hands to loosen the shell, then peel it off. You’ll be left with perfectly cooked hard-boiled eggs—no green ring in sight.
Why Timing Matters for Hard-Boiled Eggs
The difference between an overcooked egg and a perfectly boiled one is often just a couple of minutes. Many people make the mistake of leaving their eggs in boiling water for too long, thinking that more time equals better cooking. In reality, leaving eggs to boil longer than necessary causes the sulfur and iron in the egg to interact more, leading to that dreaded green ring.
Remember, even if you follow all the steps correctly, letting the eggs sit in hot water after cooking can still result in overcooking. This is why the ice bath is essential—it shocks the eggs and halts the cooking process immediately.

Other Tips for Cooking the Perfect Hard-Boiled Egg
In addition to timing, here are a few extra tips that can help you achieve hard-boiled egg perfection:
- Use Older Eggs: Fresh eggs can be harder to peel after boiling. If you plan to hard boil eggs, it can help to use eggs that are about 5-7 days old.
- Add Baking Soda: Some people add a pinch of baking soda to the boiling water, which can make the eggs easier to peel.
- Don’t Overcrowd the Pot: If you’re boiling several eggs at once, make sure they have enough space to move around in the water. Overcrowding can lead to uneven cooking.
What to Do If You Still Get a Green Ring
Even if you follow these steps perfectly, accidents can happen, and you might still end up with a green ring around the yolk. Don’t worry—the egg is still perfectly safe to eat. The green ring doesn’t affect the taste or nutritional value of the egg; it’s simply a cosmetic issue. If you’re serving hard-boiled eggs at a gathering or using them as a garnish, you can always slice the eggs lengthwise and remove the yolk to eliminate the visual discoloration.
Conclusion: Master the Art of the Perfect Hard-Boiled Egg
Hard-boiled eggs are a simple and nutritious food, but getting them just right takes a little bit of attention to detail. By avoiding overcooking and following the 10 to 12-minute rule, you can ensure that your eggs are free from that green ring around the yolk. Whether you enjoy them as a snack, in a salad, or as part of your breakfast, mastering the art of boiling eggs will elevate your cooking game and leave you with perfectly cooked eggs every time. So the next time you’re in the kitchen, set your timer, follow these tips, and say goodbye to green rings for good!


